
Want to continue your V Rising world on your server with friends? Follow this fast, foolproof method to upload your save. Even if it’s your first time with SFTP, you’ll nail it.
C:\Users\YourName\AppData\LocalLow\Stunlock Studios\VRising\Saves\v1 (or v3 depending on your game version). You should see a long alphanumeric folder which contains your world files (e.g., AutoSave_*.save). Rename this folder to a short, space-free name like MyWorld. Linux/Proton path: ~/.config/unity3d/Stunlock Studios/VRising/Saves/v1; macOS: ~/Library/Application Support/unity.Stunlock Studios.VRising/Saves/v1.
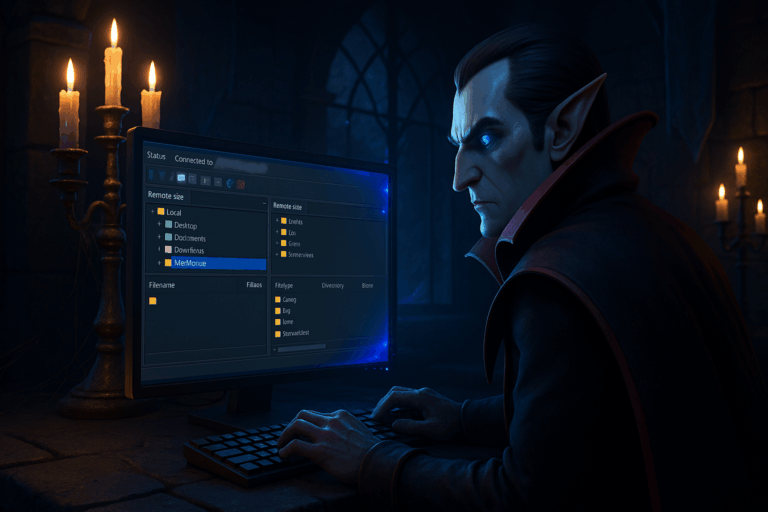
22, c) Protocol: SFTP, d) Username/password: as provided in the panel. Click ‘Connect’ and accept the server fingerprint if prompted. If connection fails, recheck port 22, protocol SFTP (not FTP), and try again.
/save-data/Saves/v3/. If v3 is not present, open /save-data/Saves/ and use the version folder that exists (v1 or v2). You should see existing world folders or an empty directory on a fresh server. If the path isn’t found, go to root and locate the save-data folder.
MyWorld folder (the one you renamed) into /save-data/Saves/v3/. Wait for the transfer to complete: progress bar to 100% and the queue empty. If a folder with the same name already exists, rename it to MyWorld_backup first or remove it if you intend to replace it. For heavy saves, you can zip the folder to MyWorld.zip, upload it, then unzip it via the panel’s file manager if available.
Save Name (sometimes SaveName) and set it to the exact folder name, e.g., MyWorld. Mind case sensitivity: on Linux, myworld is different from MyWorld. Click ‘Save’ or ‘Update’ to apply. If you can’t see the variable, clear your browser cache and reload.
Save Name being loaded. Wait until the server reports it is listening and ready. If you see ‘Save not found’ or ‘Failed to load save’, the name doesn’t match exactly or the folder is in the wrong v* version path.
Save Name and the uploaded folder location, fix as needed, then restart.
.zip archive of the folder before uploading. Send MyWorld.zip to /save-data/Saves/v3/, then use the panel’s file manager to ‘Unzip’ in place. Delete the archive afterward to free space. This reduces timeouts and corrupt transfers.
Use a short, space-free Save Name (e.g., MyWorld) to avoid encoding/case issues. Zip large worlds (2–3 GB+) to speed up and stabilize transfers. Keep a local and a server-side backup (_backup) before replacing any world. Check free disk space on the server prior to upload; incomplete uploads will not load. Server settings live in /save-data/Settings/ (e.g., ServerHostSettings.json) and are not part of the world: adjust them after importing.
Ensure the Save Name exactly matches the folder name you uploaded (including case). Confirm the folder is inside /save-data/Saves/v3/ (or the version your server uses). Check logs: ‘Save not found’ usually means a name/path mismatch. Correct it, save, and restart.
Windows: C:\Users\YourName\AppData\LocalLow\Stunlock Studios\VRising\Saves\v1 (or v3). Linux/Proton: ~/.config/unity3d/Stunlock Studios/VRising/Saves/v1. macOS: ~/Library/Application Support/unity.Stunlock Studios.VRising/Saves/v1. If unsure, search for the ‘Stunlock Studios’ folder.
Use SFTP on port 22 and a wired connection when possible. Zip before uploading, then unzip on the server. Close bandwidth-heavy apps and verify server free space. If transfers drop, enable resume in your client (FileZilla: ‘Transfers’ -> ‘Resume file transfers’).
All set! Your V Rising world is live on your server. Need help tuning settings or performance? I can walk you through the next steps.